“Success is where preparation and opportunity meet.” – Bobby Unser

Whether you’re a young energy engineer being thrown into your first energy audit or an experienced retro-commissioning (RCx) agent moving on to your next building, the planning phase doesn’t become any less important.
While the specifics of every project differ, we will consider the Planning Phase everything prior to the main site visit/audit/testing. Want to give your project manager a heart attack? Tell him you need to make another trip to get some nameplate data? Then when you come back tell him you need to go back out because you didn’t get all the photos you needed? Then when the report deadline is coming up and you’re in the middle of your investigation report, tell him there are trends missing and it’ll take two more trips and two weeks of delays to collect the data.
This site work is most likely going to be the most expensive part of the project… and oh can it get expensive. Every site visit regardless of the work to be done, has down time traveling to site, walking from location to location, waiting to check in/meet your escort, in addition to any travel costs. A small mishap leading to an additional site visit is at minimum a half-day wasted. So plan right if you want to come in on budget.
Engineering also suffers with poor planning. Nothing is more embarrassing than proposing an energy conservation measure (ECM) and being told that they’re already doing it, scoping a measure and finding out it can’t be implemented, or being called on the ridiculousness of the listed savings. Your reputation is your brand. So plan if you want a long successful career as an engineer.
Hopefully that’s enough to get you motivated. With that out of the way let’s get on to what you can do to crush the planning phase.
Step 1 – It’s a Business
It should be no surprise but sometimes we need to remind ourselves that we’re all working to make a living. This includes yourself, your coworkers, and your client(s). So before we get to the engineering let’s talk business. Below are three of the most important items you should be crystal clear on.
- Contract – Scope of Work and Budget
- Client’s Goal(s)
- Your business’ strategic objective

EVERYONE needs to read the contract. If you have a part in the project… read the contract. The scope of work (SoW) contains the task to be performed and deliverables to be submitted to receive payment. The scope of work is literally your contractual obligation. Your opinion of what an energy audit is or what RCx covers means nothing when the client points to a line in the scope of work as a reason to withhold payment. While you might not be responsible for the budget (you have a separate project manager), it’s important to understand the expected effort. Effort in this sense doesn’t mean how hard you work but how many hours are allotted to the tasks you’re responsible for. Remember, it’s a business… don’t be the engineer that dies on the hill of over-engineering and blows every budget and misses every deadline… trust me… that bravado gets old. That doesn’t mean to stay quiet if you think the budget is unreasonable. Conversations happen that you might not be in the loop on or you might misinterpret the scope. If not, at the end of the day, the numbers don’t like, and it’s best for this information to come to light when something can still be done about it.
While having the scope of work on your side is great in a battle of lawyers, it’s best to never get to this point. Acquiring new clients is very expensive and its good business to grow these relationships. While one of your PM’s primary goal is managing client expectations, you as the designated engineer have a large role to play. Most project don’t exist in a vacuum. Your project might be one step in a large corporate initiative for your client. Knowing how your client wants the next phase to start will be a guiding light on how your current project should end.
As we just discussed, new clients are expensive. The period from initial introduction to first contract in our industry is almost always greater than 6 months and in my experience, closer to 18-24 months on average. During this period, dozens and dozens of hours are spent writing emails, making phone calls, presenting, understanding the client’s needs, writing proposals, following-up, and eventually (hopefully) getting a signed contract. This doesn’t include the majority of opportunities that don’t turn in to contracts. Bouncing from a one-off project to the next one-off project, isn’t a sound strategy. If your business is willing to invest in a client, it’s usually because they see a longer term partnership/opportunity. Maybe their site needs a lot of help and your business development team is eyeing these follow-up projects. Maybe the client has several sites and this is the pilot for a larger rollout. Or maybe it simply is a resource utilization filler or project for junior staff to gain experience on. Whatever the case, you should know the larger picture and what’s at stake.
Step 2 – Document Collection
Now that we know our contract and have perspective on the project, let’s move on to the engineering… well sort of. Remember, site visits are expensive. The goal of the planning phase is to solidify the task to be performed in the investigation phase (i.e. what equipment am I going to visit, what test am I going to perform, what points am I going to trend, etc.). One of the best ways to do this is by reviewing documents and having a theoretical understanding of the site before ever stepping foot on site. Your client isn’t going to know what you need so you’ll need to provide a request-for-information (RFI). RFIs are a formal request for additional information. While it’s not uncommon to provide this in the body of an email, a word document, or PDF, I highly recommend creating an easy to use and understand excel document for your client. Your client has a full-time job and is weaving you into their busy day. Help them help you. Also, you will almost never receive all your requested documents on the first go round. An excel document functions much better as a tracker. So without further ado, here’s what to ask for:
- Drawings
- Mechanical
- Controls
- Electrical/Lighting/Reflective ceiling
- Plumbing
- Utility Data
- Electrical
- Gas
- Water
- Operational Practices
- Operating hours
- Setpoints
- Maintenance practices

If you can only have one or two pages, it’s going to be the mechanical schedules. “Schedules” are tables summarizing equipment, mechanical capacity, design values, and other pertinent information. Planning reports typically include an equipment summary and initial list of equipment to be tested. The mechanical schedules will get you most of the way to completing this portion of the deliverable.
Utility data is typically gathered early on during business development, as part of the the financial proposition for going down this road. Typically the planning report will include a utility section with baseline numbers and utility disaggregation. This will be the basis that savings are claimed against as well as a sanity check for the proposed ECMS.
Finally, you want to understand the operator’s belief of how the building operates. This conversation will tell a lot not just about energy opportunities, but the facility’s pain points. Event schedules can be hard to maintain and instead equipment runs 24/7. Similarly, when hot calls and cold calls happen, and time is short, overrides becomes the new normal. This information isn’t to be taken at face value but to be verified. Saving energy and make facility’s like easier is a win win.
Step 3 – Initial Site Visit (Optional)
Here it is! You finally get to go on site, meet the staff, and challenge your theoretical understanding of the site. Depending on how your project was priced, you may or may not have budget for this task. However, if you do, it’s usually a portion of a single day where a facility representative will walk you around site to gather your pictures, ask your questions, rummage through the drawing room, and fill in the gaps in your knowledge.
There’s a few goals for this visit.
- Gather information to finish your planning report
- Gather information to solidify the test and tasks for your investigation
- Decide whether the project should be continued
I bet not every one of you saw that last one coming but it’s true. Another name for the planning phase, is the PFA (preliminary feasibility analysis). With the utility analysis, you’ll have a good understanding of the building’s energy consumption as it compares to its peers. After your initial site visit, you’ll have a general idea of the low-hanging fruit (i.e. schedules, resets, VFDs, economizers, overrides, equipment condition, etc.). For many energy projects this is the last chance to pull-out and cut losses, before significant cost is sunk and
Step 4 – Planning Report
Now, the planning report! The capstone of the initial phase. Your scope of work (remember that!) might stipulate exactly what needs to be included and can very greatly. Typical items included are:
- Basic site information (i.e. building age and size)
- Mechanical system summary (i.e. DX vs. chilled water, VAVs vs. dedicated units, DDC vs. pneumatic)
- Mechanical Details
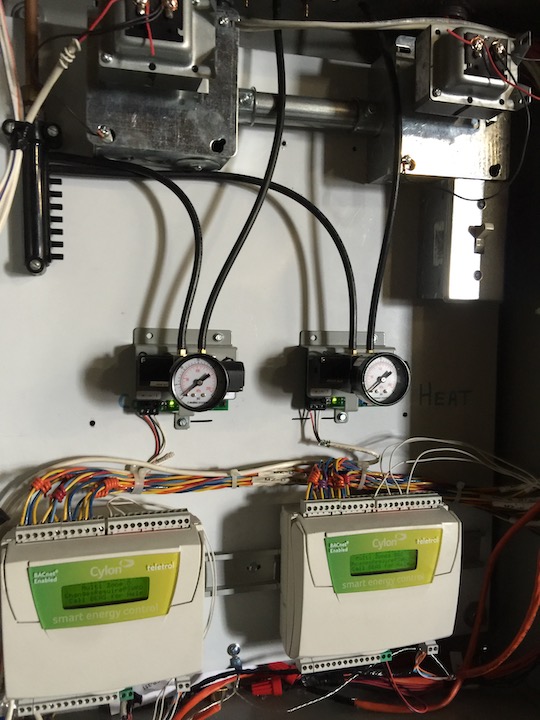
- Equipment photos
- Major equipment information (i.e. motor size, efficiency, insulation class, variable speed)
- Utility Metrics
- Establish baseline
- Comparison to peers
- Monitoring Plan
- Which building automation points to trend
- Which data loggers to be installed
- What power readings and spot measurements to take
- Preliminary opportunities
As long as there are enough opportunities to justify the project continuing, the planning report ends up being a milestone to make sure you didn’t skip steps and miss information required in the following phases.
Much of the information just gathered is going to be used during the investigation phase. You should now have enough information to setup a testing plan. Which equipment you’re going to test, how you’re going to test them, and what opportunities you’re going to keep a particular eye out for. You’re also going to be using the mechanical information and monitoring points to identify opportunities and calculate their energy savings.
The final report and/or systems manual, as the names hint, put a bow on the project. Savings are finalized and verified here… so no skipping on the baseline! You also need to update the systems. Many of the equipment will stay the same, and will be a simple copy and paste, only if you did you job during the planning phase.
Conclusion
So there we have it… the planning phase from start to finish. Not the most glorious but like most things, proper preparation makes the rest of the tasks that much easier and valuable. In this section we covered why:
- Taking a step back to understand the scope of work and the business objective for both (if not more) parties is important for project success.
- What documents to include in an RFI and which of these to put extra emphasis on gathering.
- What tasks to be accomplished on your planning phase site visit
- What to include in a planning report to improve the chance of success in future phases.